项目使用Gradle作为依赖管理工具。
添加项目依赖
新建Gralde的web项目,添加spring-webmvc依赖,添加servlet-api的依赖。
group 'cn.yerl'
version '1.0-SNAPSHOT'

apply plugin: 'java'
apply plugin: 'war'

sourceCompatibility = 1.8
targetCompatibility = 1.8

repositories {
    mavenCentral()
}

dependencies {
    testCompile group: 'junit', name: 'junit', version: '4.11'
    compileOnly group: 'javax.servlet', name: 'servlet-api', version: '2.5'
    compile group: 'org.springframework', name: 'spring-webmvc', version: '4.3.3.RELEASE'
}
添加spring配置
在src/resources目录下添加spring-context-config.xml。
<?xml version="1.0" encoding="UTF-8"?>
<beans xmlns="http://www.springframework.org/schema/beans"
       xmlns:xsi="http://www.w3.org/2001/XMLSchema-instance"
       xmlns:context="http://www.springframework.org/schema/context"
       xmlns:mvc="http://www.springframework.org/schema/mvc"
       xsi:schemaLocation="http://www.springframework.org/schema/beans http://www.springframework.org/schema/beans/spring-beans.xsd
        http://www.springframework.org/schema/context http://www.springframework.org/schema/context/spring-context-4.1.xsd
        http://www.springframework.org/schema/mvc http://www.springframework.org/schema/mvc/spring-mvc-4.1.xsd">

    <!-- scan the package and the sub package -->
    <context:component-scan base-package="cn.yerl.spring.demo"/>

    <!-- don't handle the static resource -->
    <mvc:default-servlet-handler />

    <!-- if you use annotation you must configure following setting -->
    <mvc:annotation-driven />

    <!-- configure the InternalResourceViewResolver -->
    <bean class="org.springframework.web.servlet.view.InternalResourceViewResolver" id="internalResourceViewResolver">
        <!-- 前缀 -->
        <property name="prefix" value="/WEB-INF/view/" />
        <!-- 后缀 -->
        <property name="suffix" value=".html" />
    </bean>
</beans>
设置web.xml
添加spring-servlet配置。
<?xml version="1.0" encoding="UTF-8"?>
<web-app xmlns:xsi="http://www.w3.org/2001/XMLSchema-instance"
         xmlns="http://java.sun.com/xml/ns/javaee" xmlns:web="http://java.sun.com/xml/ns/javaee/web-app_2_5.xsd"
         xsi:schemaLocation="http://java.sun.com/xml/ns/javaee http://java.sun.com/xml/ns/javaee/web-app_2_5.xsd"
         id="WebApp_ID" version="2.5">
    <display-name>spring</display-name>

    <servlet>
        <servlet-name>spring-servlet</servlet-name>
        <servlet-class>org.springframework.web.servlet.DispatcherServlet</servlet-class>
        <init-param>
            <param-name>contextConfigLocation</param-name>
            <param-value>classpath:spring-context-config.xml</param-value>
        </init-param>
         <load-on-startup>1</load-on-startup>
    </servlet>

    <servlet-mapping>
        <servlet-name>spring-servlet</servlet-name>
        <url-pattern>/*</url-pattern>
    </servlet-mapping>

</web-app>
新建Controller
添加controller。
package cn.yerl.spring.demo.controller;

import org.springframework.stereotype.Controller;
import org.springframework.web.bind.annotation.RequestMapping;

@Controller
@RequestMapping
public class IndexController {

    @RequestMapping("/hello")
    public String hello(){
        return "hello";
    }

}
添加视图
在src/main/webapp/WEB-INF/view目录下添加新文件,hello.html
<!DOCTYPE html>
<html lang="en">
<head>
    <meta charset="UTF-8">
    <title>Hello Spring</title>
</head>
<body>
Hello Spring
</body>
</html>
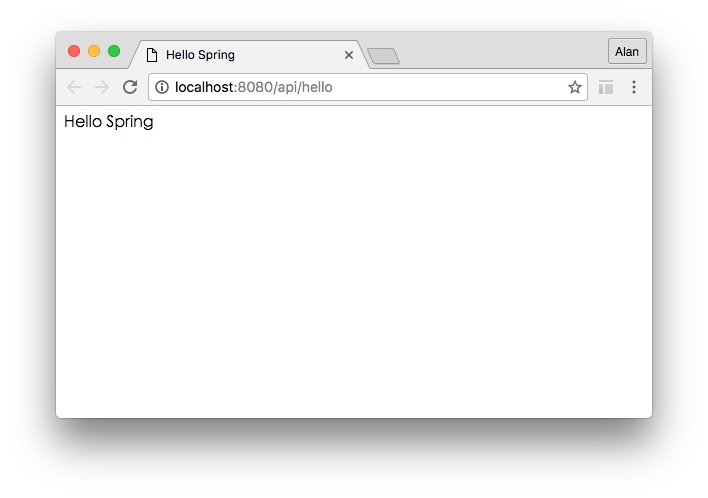
效果